Last Updated on March 30, 2020 by Team TRA
Any car owner should have a few fundamental skills under their belt, including how to change your oil. In this guide, we’ll show you how to do change your oil step by step.
The average oil change costs between twenty and one hundred dollars. That’s a lot of money to shell out every few months. Changing your own oil is a great way to save money and ensure your car is still getting the proper care it needs. Did no one ever teach you how to change your oil? Many people aren’t familiar with the process. Read on to learn how.
How to Change Oil: 9 Steps
Difficulty Level: Beginner
How long does it take to change your oil? It depends on how skilled you are and if you have professional tools. On average, it takes about 45-60 minutes but can range anywhere from 30 minutes to 120 minutes.
Keep your engine in the game by following these steps and feeding it fresh, new oil.
Step One: Learn How to Know When You Need an Oil Change
There is a lot of competing information out there about when your car needs to have its oil changed. When you get your oil changed at a shop, they usually put a sticker on your car that has two sets of numbers on it. One is the date at which they think your car should next be serviced, and the other is the number of miles your car can take before it’s time for an oil change.
How often should you change the oil in your car? For many years, trusted mechanics would recommend that people come in for servicing every three months or three thousand miles. But with the advent of the internet, more information is available to the layman than ever before. We no longer have to take a mechanics word for it. We now know that many cars can go as high as 10,000 miles between oil changes especially if they are running full synthetic oil.
Of course, much of the capability for that kind of mileage comes from the advances in technology that have improved engine designs as well as the use of synthetic oils. To decide when your oil needs to be changed, consult the manual from your vehicle’s manufacturer. If your car was made after 2008, it’s likely to say that you only need to change your oil every 7,500 miles. So to answer the question “how often does synthetic oil have to be changed?” we’d advise every 6,000 to 10,000 miles.
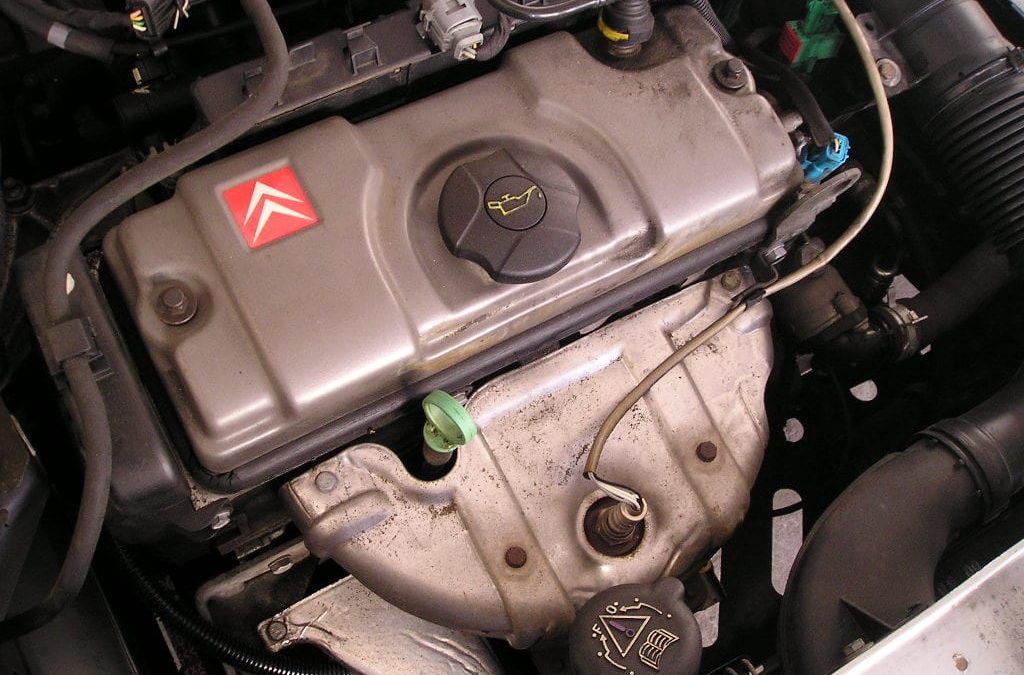
Don’t be a Dipstick! Use the Dipstick
In addition, you can always check the dipstick under the hood of your car. With your car off, simply pull the dipstick and wipe it off on a clean cloth before reinserting it all the way.
Then, pull it out and see if the oil level goes up to the fill line. You should also pay attention to the color of the oil. If it’s the color of Coca-Cola, then it’s time for a change. Your oil should be a nice light color, like that of a cup of tea.
Step Two: Select the Oil that you Want to Use
Selecting the best type of oil for your vehicle depends on the make and model, as well as your driving habits. But for most people, the selection comes down to price in the end.
Conventional oils are more affordable, but they also need to be changed more frequently. Synthetic oils are costly, but they will help your car perform for the longest amount of time possible between oil changes.
You should consider what kind of oil you have already been using in your car to make this decision. If it has been given synthetic oil from the start, then it makes sense to keep it up. In the long term, this will help your engine last longer.
Whereas if you have an older vehicle that has always gotten traditional oil changes, now is not the time to switch over to synthetic. Your car is accustomed to the oil it has been using and is thoroughly saturated in it. Even when you drain your oil, some of this oil will be leftover and affect the way your car runs. Synthetic oil could be a waste of money.
How Much Oil Do You Need?
Most vehicles will need about 5-6 quarts of oil. To find out how much and what kind of oil your car needs, consult the owner’s manual.
Be sure you buy the right viscosity for your engine. If you’re unsure, bring your manual to the store with you when you go to buy your oil. The people there will make sure you get what you need.
Step Three: Gather the Other Required Supplies
Besides the oil, you will need to gather several other tools before you start working.
Make sure you have a wrench handy so that you can remove the plug from your vehicle. You should also have a wrench specifically designed for your oil filter if you plan to change that.
You will also need to purchase a pan for the oil to drain into, a funnel to use to pour new oil in, latex or polyethylene gloves to protect your hands from the chemicals, and potentially a jack or ramp if your vehicle has low clearance.
If you want to save some additional money, you can avoid buying a funnel by using a dry water bottle with its bottom cut off.
Pro Tip: Buy an oil collection pan that has a lid and pour spout to make cleanup easier. Many people have spilled their old oil on themselves during transport to the garbage, you don’t want that to happen to you.
Step Four: Decide if You Will Change Your Filters
Changing both your air and oil filter are optional parts of the oil change process. At a professional oil change business, these are both typically offered as upgrade options.
How to Know if You Should Change Your Oil Filter
If your motor oil doesn’t properly filter, then it can become contaminated with tiny particles that will wear away at the parts in your engine.
You will know your oil filter needs to be changed if your car isn’t accelerating properly. If the problem is really severe, then you may notice that your car begins to lose its ability to maintain speed.
In extreme cases, when you let your oil level get really low and you have a clogged filter, you may notice the sound of metal on metal. If this happens, be sure to stop driving immediately and introduce new oil into the system before starting the vehicle again to avoid damaging it.
A final way you may know it’s time to change your oil filter is if you notice the exhaust coming out of your vehicle is black or dirty. You will be able to smell burning oil as it leaves your exhaust pipe.
When to Change Your Air Filter
Another part of the routine maintenance that is included with an oil change is often an air filter replacement. Many times this is just a way to upsell you on more products so a mechanic can make more money.
But, if you do have a clogged air filter, it can affect the quality of air in your car as well as contribute to a reduction in your gas mileage. If your mileage is suffering, it’s a good signal that it’s time for a change.
Step Five: Prepare Your Vehicle for an Oil Change
Before you are ready to start changing your oil, you need to get your car into a place where it won’t need to be moved for a half hour or so.
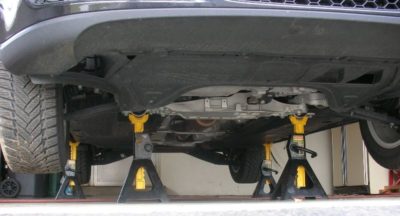
If you have a car that is low to the ground, then you will need to jack it up so that you can access the oil plug, pan, and filter. Make sure that you use a jack stand and don’t work underneath a car that is only supported by a jack.
Step Six: Drain the Oil
To begin to drain your oil, you will need to locate the plug underneath your car. Make sure you place your drainage pan below the plug.
Notice that the angle of your drain plug may make it so that it doesn’t flow straight down. That means you will need to place your drainage pan a couple inches to one side in order to catch the oil.
Pro Tip: If you’re changing your oil outdoors on a windy day, be extra careful with your drain pan. A gust of wind can blow the ribbon of oil making things very messy.
Once you have your drain pan in place, you will be ready to release the drain plug. At this point, you should put your gloves on because things are about to get messy.
Use a wrench to unscrew the drain plug and get out of the way.
Optional: Change the Filter
Now that your oil is draining move on to the filter. Remove it by twisting it counterclockwise. Make sure you are careful not to spill any of the oil that is in the filter. Set it aside, wrapped in newspaper, to be taken to a recycling center along with the oil you removed from your car.
Now get out your new filter and moisten the gasket on it with a little bit of new oil. Then you should be able to easily slide it into place where the last one was. Make sure it’s screwed in securely.
Step Seven: Clean Up a Bit and Replace the Plug
Now that you have completed the messiest parts of your oil change, it’s time to do a little tidying up. Use a paper towel to wipe around the area the oil plug will go into once all the oil has finished draining.
Now you need to put the plug back into place and use your wrench to tighten it. Make sure that if you purchase a new plug, you install new gaskets along with it. Otherwise, the seal could be compromised.
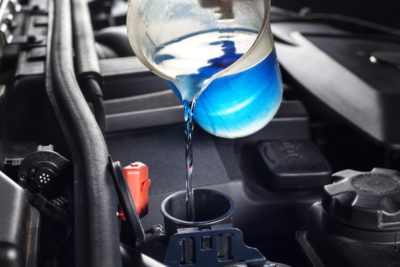
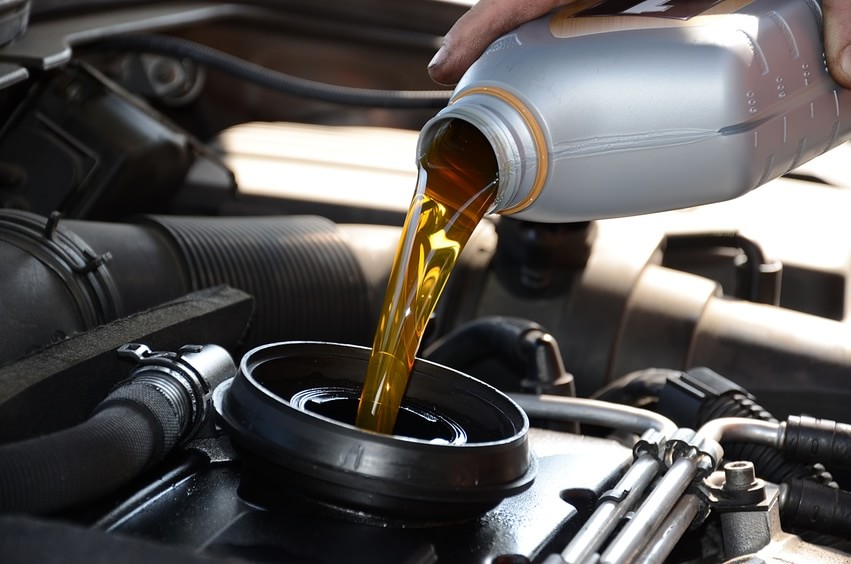
Step Eight: Add New Oil and Check its Level
Now that you have most everything back in place, you are ready to pour the new oil into your engine. Use your funnel to fill it slowly, giving the oil plenty of time to settle into the engine.
Rather than pour all of the oil in at one time, reserve one quart of oil so that you can fill your engine up to the perfect level.
To ensure your car has the proper oil level, you should replace the oil filler cap after adding the majority of the oil and run your engine for thirty seconds. This will give you time to check for leaks around your drain plug or filter and allow the oil to make its way fully into your engine.
After thirty seconds, you should allow your car to cool down for five to ten minutes before checking the oil level again to see where it settled. Do this by checking the dipstick the same way we talked about earlier.
If the level of oil appears to be low, then keep adding a little bit at a time until it hits the mark perfectly.
Step Nine: Clean Up and Ride Out
Now that your oil is all settled in all you need to do is remove the oil drain pan from under your car and take it to a recycling location. Some options include your local auto parts store, a city recycling facility, or some other place that has the capacity to recycle oil.
This will give you an opportunity to make sure your car is functioning properly after your oil change, while simultaneously taking care of a chore.
Additional Tips for How to Change Oil
Although you have a basic understanding of how to change your oil in your car, here are a few more tips for you to use. If your engine is cold when you begin your oil change, you should start your car and allow it to run for about five minutes to give the oil a chance to warm up. This will allow it to come out more easily. But if your car is hot, then you should wait thirty minutes for it to cool down. This is to avoid burning yourself.
One last tip, line up your oil bottles in a row so you know how many you have used as you go. You may think it will be easy to keep count, but one small distraction could mess you up.
Now that you know how to change oil, you’ll be able to save some money regularly. But not every car problem that you have is as easy to solve. For more help and DIY articles, check out our car owner’s help section today.